CWU NASA Student Rocket Launch

Figure 11
Construction

Figure 12
The Construction Process
The payload team used only two main processes to complete the construction of the parts. The primary option were the 3D-Printers. These printers allow for customized parts to be made exactly how the team needs them. The printers were used to make about 80% of the total parts.
The other process was using a band saw. This was used to cut two of the three plates and to cut the rotation stop all made from a polycarbonate sheet. This was done over the 3d printing as we had the sheet readily available and decided to make use of it.
The team also made use of a dremel and lots of sand paper to fix parts that were not quite perfect after being 3D printed.

Figure 13

A 3D-printed part made from ABS. This is the nose plate used for keeping the structural integrity of the payload. Notice the hole at the top which allows a screw to connect the rocket body and the plate.
Figure 14
The picture to the right shows the process of epoxying the plates to the linear actuator. This was done with 15 minute epoxy and spreading it amongst the contact areas.

Figure 15
This picture shows the process of epoxying the bearings into the mount part. Then testing the fitting and rotation with the extension piece involved.

Figure 16
This picture shows the sanding of the mount. This piece needed heavily sanding to allow for correct fitting with the extension piece. As well as sanding the interior portion of the mount allowing for smooth movement of the motor tube/motor.
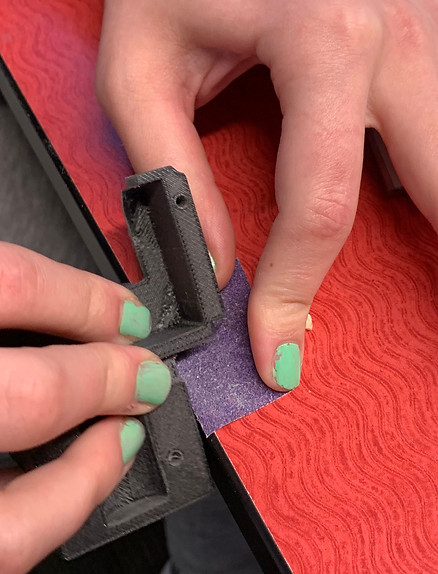
Figure 17
This video shows a 3D printed piece that just finished printing. This shows the process of removing the support from the part. This was a process on every 3D printed part.
This video shows a dremel being used to cut out portions of a part that didn't quite fit as expected.

Figure 18
To the left is the full mount made to hold the battery, spring, motor and camera on top of it. All custom made parts here were made from nylon carbon fiber.
Tools Used
The main tool used is shown above, the 3D printer. Nearly all of our parts were 3D printed out of Nylon Carbon Fiber. Once parts were 3D printed, a good majority were sanded to make sure they perfectly fit together. A bandsaw was also used to cut the two polycarbonate plates we have. Then sanded with a sanding machine.
Other tools that were used a small amount were a dremel, band saw, sanding paper, tapping tools. These were not used nearly as much as the 3D printed but were used on occasion.